For this post, we are excited to have Elizabeth, our sister, walk us through the process of creating the curtains for the boat. We will have updated pictures of the curtains up in the boat once we get to that point, probably in a month or so. Thank you Elizabeth for taking the time to create this post! :)
----------------------------------------------------------
GUEST POST: Portlight Covers & Curtain
I was honored when I was asked to do a guest post by Jeff and Angie. My goal is to give you some basic tips that I learned in my experience of creating their interior curtains.
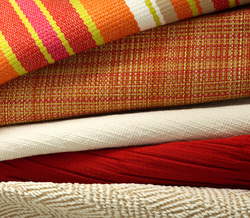
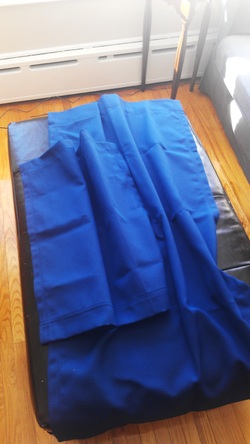
I wasn’t sure where to start at first, so I began doing some research and quickly realized that typical cotton fabrics were not a preferred medium for a boat. The reason being that cotton is susceptible to mold, mildew, and deterioration. Good news though! There are a lot of acrylic and synthetic types of material to choose from, which is great if you are looking for something specific. I decided to go with a simple eco-friendly Keywest Blue fabric from the Bella Dura fabric line. This particular fabric is 100% Polyolefin and will resist mildew, harsh chemicals, and can still be cleaned.
http://www.bella-dura.com/
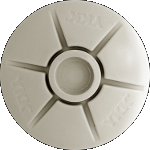
When deciding on the location and type of curtains you are wanting to create, you will need to consider how you want them to hang, or attach to the boat. For example, the curtain dividing the sleeping area from the common area in Jeff and Angie’s boat will be hung on a tension rod. However, the curtains covering storage areas or the port lights may need to be more secure. For these I found a product called SNADs. These are a plastic snap that attaches to the boat with an adhesive backing and are designed to work with coordinating snaps on curtains to hold them in place.
http://www.ykksnap-america.com/marine0.html
Once you have decided your hanging preference, you will need to take measurements of the areas you are wishing to cover. Creating a template for some port lights may be helpful.
The next step is simply taking your fabric and measurements for your opening and deciding your appropriate cuts. For a tension rod, you will want to add 3-4” to top the as to accommodate for the rod. For SNAD hardware this would not be necessary. Also don’t forget to add appropriate seam allowance on sides and bottom for hemming and finishing. I would say adding a little more seam allowance than usual will be helpful for you. I believe I added about 2” on the sides and 3” on the bottom for finishing. Acrylic and synthetic fabrics tend to unravel quite badly, so you will have excess strings and mess to contend with while hemming. You will want to use your excess fabric in the finishing process. For example if you add 2” to the sides you will want to turn the fabric ¾” and then again 1 ¼”. (Or measurements similar.) Also, something to think about is the fact that ironing is very difficult if not impossible on these fabrics. Turn your iron down significantly; I would suggest using a pressing cloth of some kind over your fabric. If you choose to iron directly on your fabric, please test on a sample piece first to make sure. My fabric ended up melting to any contact with an iron. At this point you can start turning in your edges. The larger seam allowance should allow you space to hide all of the unsightly unravelling. You will want to do your best to iron these folds in place. The use of pins will also be your friend to hold everything in place before you actually being stitching on your fabric. I used a typical polyester thread in my machine, nothing too fancy is needed. I would suggest a somewhat heavy duty needle as you are sewing through quite a few layers of fabric.
The process for the port light curtains will be a little different. There will be no hems on these curtains as their port lights are somewhat oval in shape. You will want to get a bias tape binding to finish off the edges. I originally purchased a Sunbrella brand binding from the Sailrite site, but found that it was such a heavy duty binding that my sewing machine simply would not sew through the layers. If you have access to a commercial heavy duty sewing machine, this may not be a problem for you. Since I do not want to choose the typical cotton binding sold at sewing shops due to mildew possibilities I will be making my own binding out of a synthetic fabric and attaching this to the covers. There are many great resources along with a fantastic video for measuring and creating port light covers on the Sailrite website (see below). This video also includes information on using the SNAD system. The video was what I based my covers off of for Jeff and Angie’s boat. (I will not be including the insulating factor in these covers like they did in the video. Toronto weather does not allow for winter boating experiences so this would be unnecessary.)
Sailrites helpful video can be found here: http://www.youtube.com/watch?v=17x35kCOxK4
I will admit, due to distance I will not be installing the SNAD system snaps as I cannot accurately tell where they would need to be placed. You can ask Jeff or Angie later for their experience and input on how they work.
If you need a place to start ,there are plenty of curtain tutorials and sewing blogs on the internet and I am certain even a novice sewer would be able to figure out how to create amazing curtains for his/her boat.
Specifically for the Tanzer 22, the measurements for our curtains are:
Hanging curtain (separating the v-berth from the cabin): 19 in. across, 42 in. long
Curtain to cover the ice box: 19.5 in. x 22 in.
Portlight curtains (there are 6 windows in total): 18.5 in. wide (at the widest point), 5 in. tall
 Sparks Of Creativity
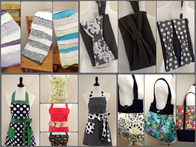
Elizabeth is our talented sister (Jeff's by blood, Angie's by luck!) who makes some amazing items! Check out her website and store here:
https://www.etsy.com/shop/MySparksofCreativity
