Portlight Recoring
The big job that I have been hesitant to do all winter. It doesn't help that it has been a very long winter that has threatened even the low temperature epoxy hardener (it only cures at 35F and above).
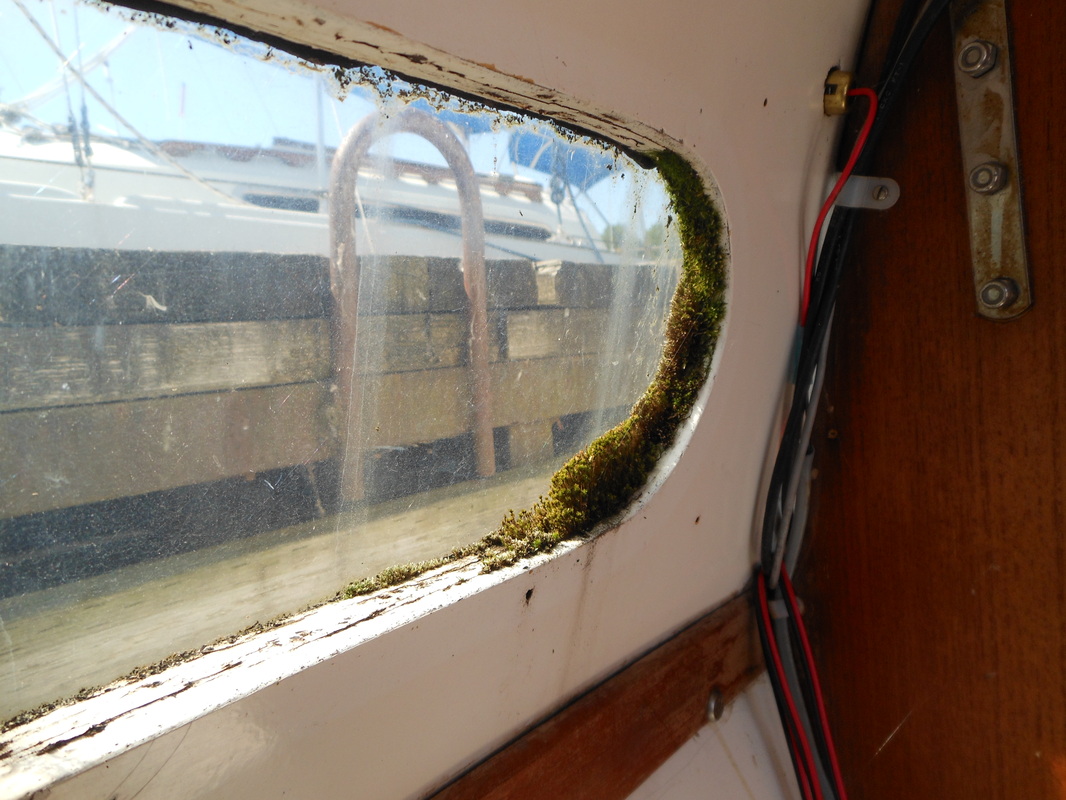
The core around the windows was thoroughly soaked thanks to poor installation. So soaked, that this moss was quite at home on the exposed plywood. Angie found that this vegetation to be cute and thought perhaps we should keep it as a decorative flourish. If it weren't for concerns about what was going on underneath, it may have made a nice travel companion.
Structurally, I do not believe that the core material in this area does much. The core only extends 3/4" above the portlight opening and the area above it is completely hollow between the two skins (not what I was expecting). However, even if it was not structurally important, the thought of rotting wood anywhere in the boat is not appealing.
The first cuts were very difficult to make. It helped that on the first attempt I had a friend with me for moral support.
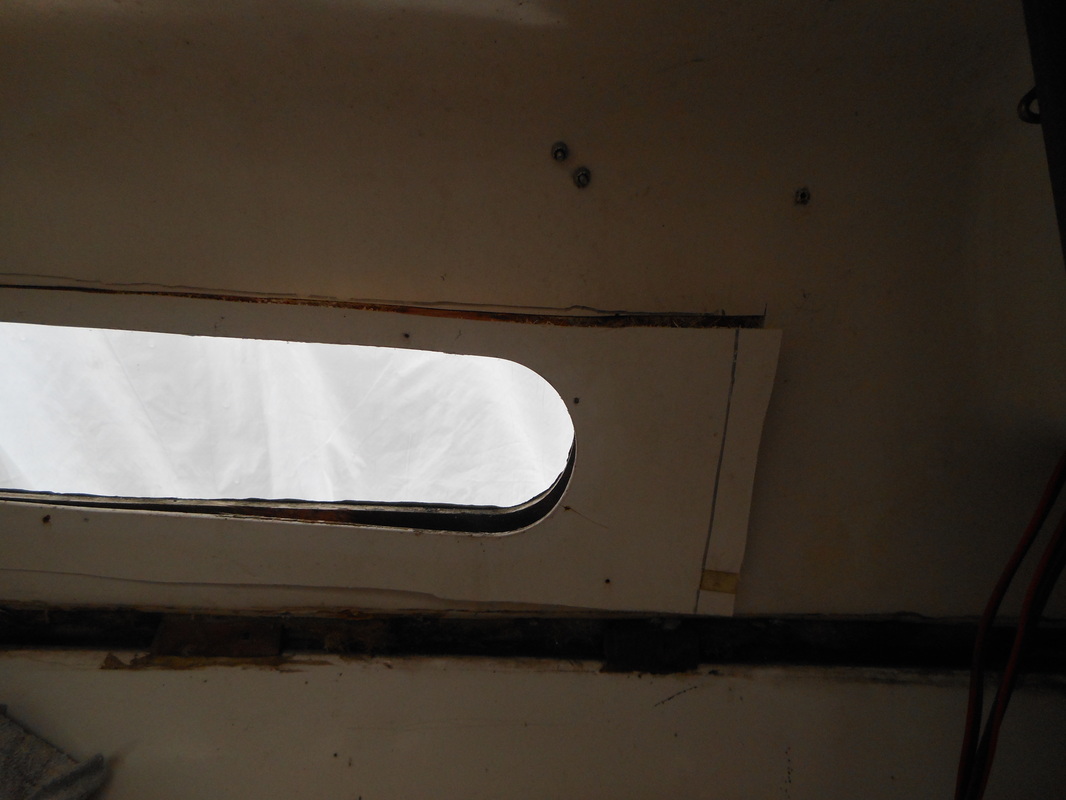
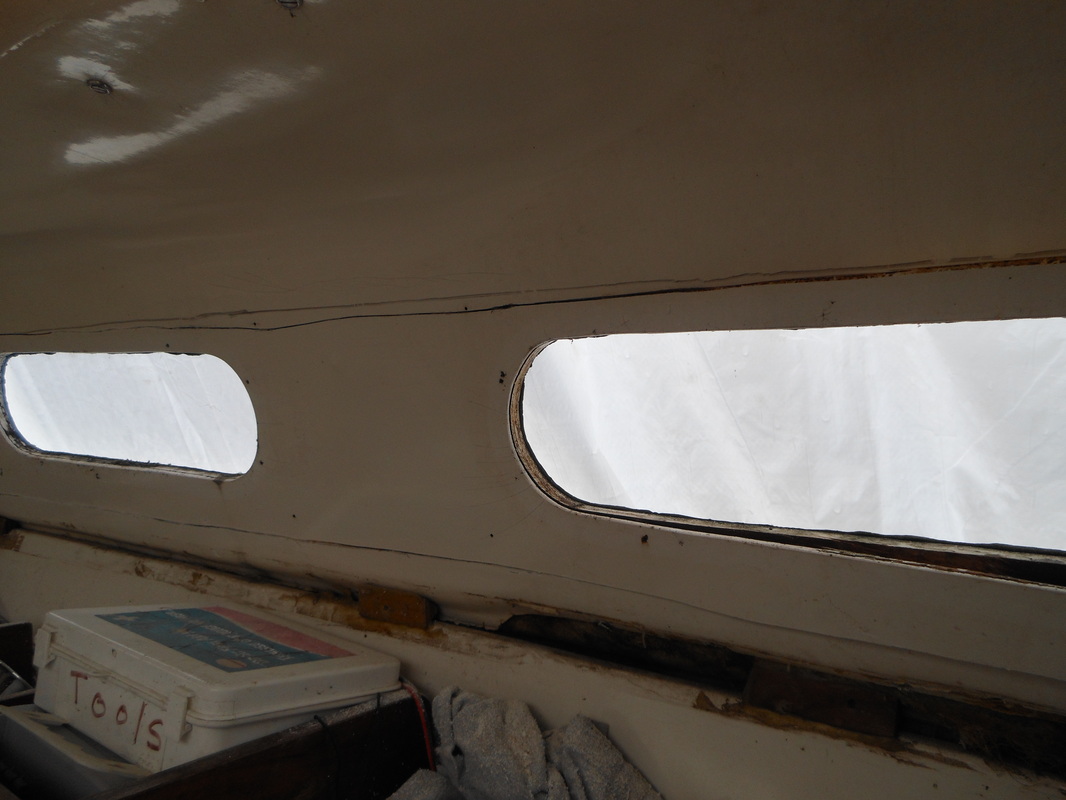
As can be seen, I did my best to cut straight, but it was very difficult with the tool I was using over such a long distance (crouched in a sailboat, often reaching over obstacles). As with the cabin sole, my tool of choice was an oscillating multi-tool with a half-circular cutting head. This makes the least amount of fiberglass dust and is the easiest to control the depth with. I find it doesn't cut soft things very well (including skin, which is a plus), so it was easy to know when the head was through the first layer of fiberglass skin and into the wet wood. A circular saw or an angle grinder with a depth setting might be easier to cut a straight line with, but I find the multi-tool to be a good option.
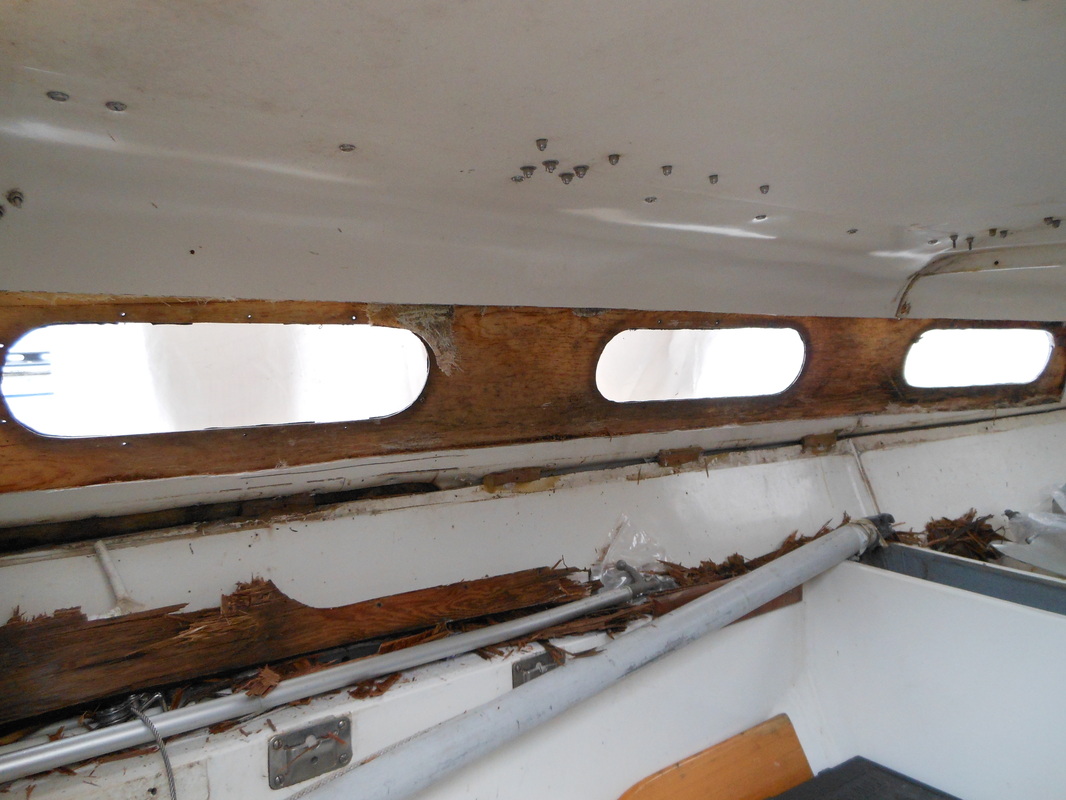
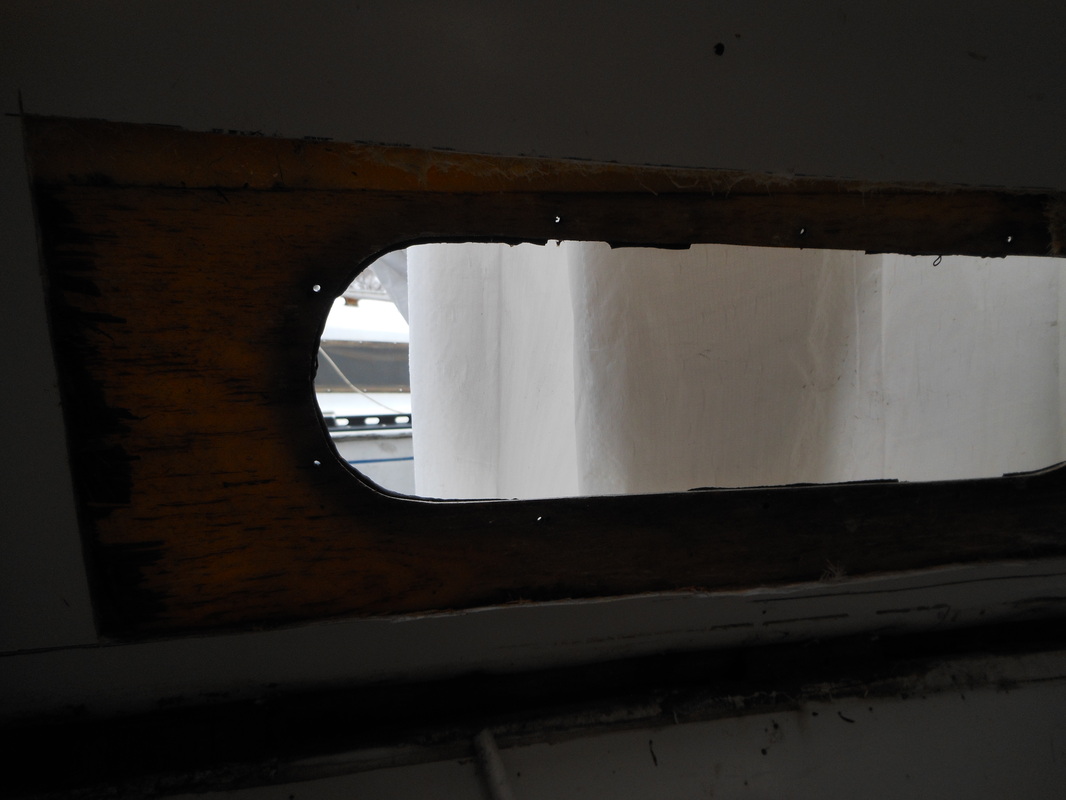
It was also difficult to know where the wood started and stopped above and below the portlights before taking the skin off, I drilled test holes to try to determine the line, but over the almost 8' length, the exact location of the core seemed to change. After I got the skin off, I realized that this is because the plywood tapered up at the aft end and tapered up and down at the forward end. I did not actually get to the very terminus of the core material fore or aft, as I hit solid wood and decided not to cut any farther.
I learned a couple of things in this process. First, even weakened fiberglass holds perniciously. This is true both in its bond to the core material and anywhere that the cut was not complete. All of the core was completely wet, but the parts that were not rotted were holding on to that fiberglass skin with impressive adherence. Second, marine plywood, even when thoroughly saturated, is incredibly strong. The rotten stuff just fell away, but the areas that were only wet had to be chiseled off one ply at a time. I expected to be able to just rip it out, but it wasn't that simple.
As can be seen, I did my best to cut straight, but it was very difficult with the tool I was using over such a long distance (crouched in a sailboat, often reaching over obstacles). As with the cabin sole, my tool of choice was an oscillating multi-tool with a half-circular cutting head. This makes the least amount of fiberglass dust and is the easiest to control the depth with. I find it doesn't cut soft things very well (including skin, which is a plus), so it was easy to know when the head was through the first layer of fiberglass skin and into the wet wood. A circular saw or an angle grinder with a depth setting might be easier to cut a straight line with, but I find the multi-tool to be a good option.
It was also difficult to know where the wood started and stopped above and below the portlights before taking the skin off, I drilled test holes to try to determine the line, but over the almost 8' length, the exact location of the core seemed to change. After I got the skin off, I realized that this is because the plywood tapered up at the aft end and tapered up and down at the forward end. I did not actually get to the very terminus of the core material fore or aft, as I hit solid wood and decided not to cut any farther.
I learned a couple of things in this process. First, even weakened fiberglass holds perniciously. This is true both in its bond to the core material and anywhere that the cut was not complete. All of the core was completely wet, but the parts that were not rotted were holding on to that fiberglass skin with impressive adherence. Second, marine plywood, even when thoroughly saturated, is incredibly strong. The rotten stuff just fell away, but the areas that were only wet had to be chiseled off one ply at a time. I expected to be able to just rip it out, but it wasn't that simple.

Below is a video of the worst of the rotting. The ply is so gone that I can knock it off with one hand while trying to film with the other:
After taking out all of the bad wood, I allowed things about a week to dry out before beginning the rebuilding process. It felt good to rid the boat of all of that rotten wood, and it probably made her a few pounds lighter! It was not a time consuming process, but it was not easy to work up the courage to cut two huge holes in the side of the boat. I will follow up with the replacement procedure in another post.
