V-Berth Cushions for the Tanzer 22
When we bought the boat, the seller was unable to find the old cushions for our boat. Which was ok by me, since I figured 30+ year old cushions probably should be replaced anyways. For my preferences, it was (is) important that the boat have a very comfortable v-berth, since what excites me most about having this boat is the prospect of affordable weekend getaways.
 SAMPLE picture of T22 cushions (not our boat)
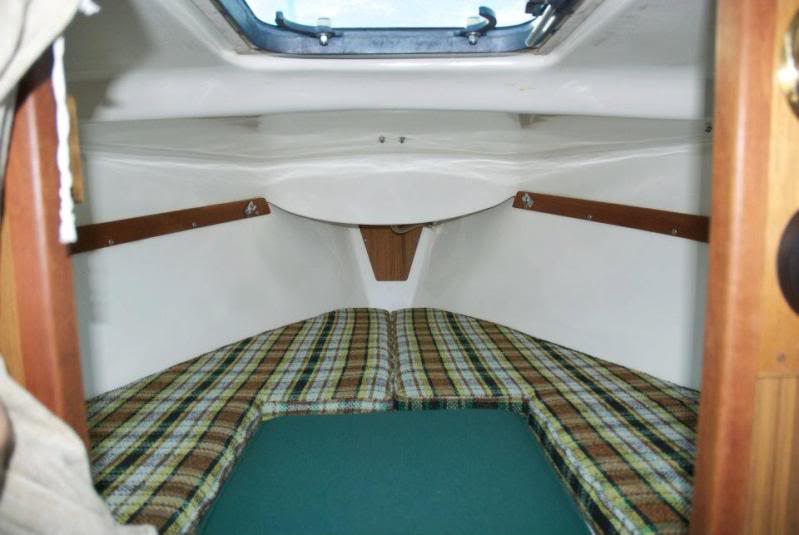
After some basic research, I learned that the typical Tanzer 22 v-berth cushions were 3 pieces total. I found a picture online (originally posted in a SailNet discussion group) of another person's T22, that shows the original cushion shape quite well. As you can see, the normal plan for the v-berth is 3 total cushions, 2 identical and one middle rectangle that sits atop the removable board (where most of us put our toilet).
 the Ikea mattress- Sultan Florvag
I learned quickly that foam in craft stores is unnecessarily expensive (in my opinion), and also, not the most comfortable. Jeff had mentioned that he saw someone on a Tanzer discussion board talking about using foam mattresses as an alternative. I liked that idea!
I did some configuring of the dimensions after measuring the v-berth, and figured out that if we were to make 5 cushions for this space (instead of 3), we could use a double-sized mattress for the project. To make the long pieces as they are in the sample picture above, we would have needed a queen size or larger. I also don't mind the idea of smaller cushions anyways, for easy maneuvering in and out of the boat.
So eventually (after watching the sales for a while) we found this Ikea mattress (the Sultan Florvag) on sale for $99 for a full size, so we purchased it. The thinking behind our choice wasn't all that scientific... we just went with the cheapest mid-range foam mattress (going with foam for obvious reasons... cutting through springs would prove not ideal!) It is very comfortable for a thinner mattress (about 3.5 inches, without the cover). Getting something thicker would not only have been more expensive, but also could make the v-berth a little too claustrophobic. So this one seemed to work quite well.
The only little thing I didn't think about when we got this, was that because of the way the full-sized mattress needed to be cut, we would eventually have to flip one or two of the pieces in the end, thus having the 'topper' part of the mattress actually facing the boat and not our bodies. Because the topper on this one was essentially nothing more than a different colored piece of foam, in the end I can't tell at all which are which, and it doesn't matter. But this is something to consider, if you are doing a similar project with a full-sized mattress, if the top of the mattress is drastically different in texture or support than the bottom of it.
 my graph paper cushion pieces
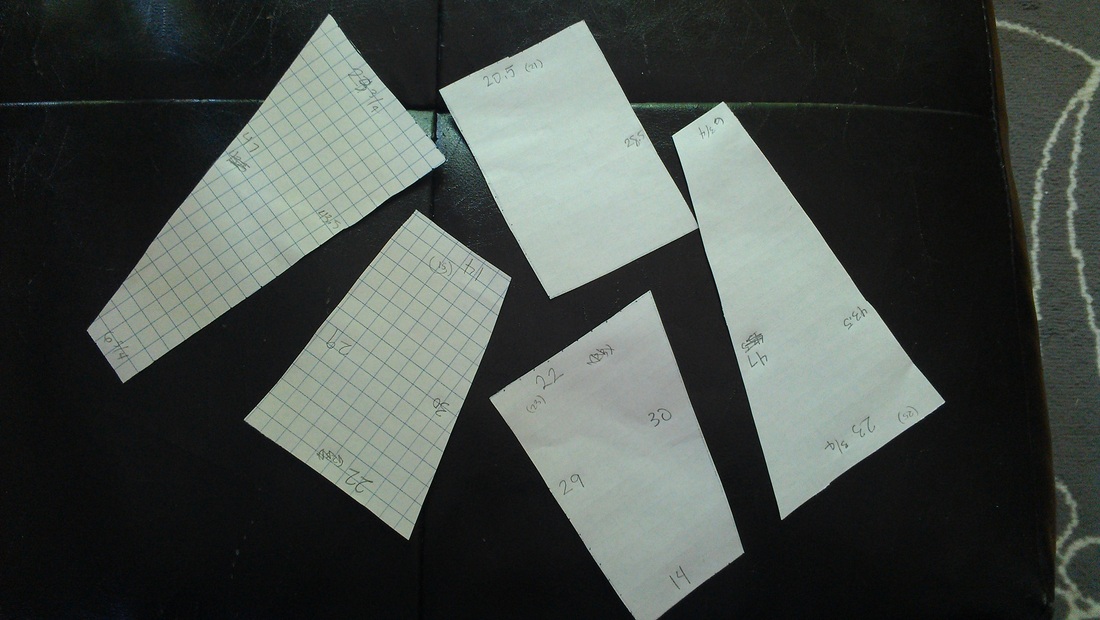
I am a very visual person, so I needed to figure out the sizes in my own creative and perhaps convoluted way. So I got some graph paper, sized out the double mattress, and figured out the sizes of the pieces I would need for the v-berth. Then, I cut these pieces out with more graph paper to scale, and moved them all around my double mattress graph paper drawing. Finally, I got a configuration that I liked, that involved the least amount of cuts, and also left a sizable chunk leftover that is big enough to actually be used for another project down the road, if I so choose.
For those interested in making some v-berth cushions for their T22, here are the dimensions:
middle rectangle: 21 x 28.5
2 pieces on either size of the rectangle, that touch the bulkheads: 22 x 30 x 14 x 29
2 pieces at the front of the boat: 24 x 43.5 x 7 x 47
In general, I tried to go about one inch bigger than these pieces called for all around if I could, to ensure I had enough mattress (always easier to cut more than add more!) Also, the sides of the boat are very slanted, and I found the fit to be very forgiving (if pieces were cut a little larger). However, working with a double mattress, there was very little breathing room when it came to 'extra inches'. So I just cut them as large as I could in the configuration I had them in, and hoped for the best!
 the mattress, just before the cut
Here's a picture of the mattress all mapped out before the cuts (after the cotton mattress cover was removed). Once that was done, I used an electric kitchen knife to cut through it (Jeff had seen somewhere that this worked well for cutting foam). It took some effort, but it did eventually cut things pretty well. Many times, I felt like I had to 'saw' to get through it. The pieces weren't perfectly even on the edges, but I found the fabric to cover this nicely and it didn't really matter in the end!
I didnt get any pictures of the pieces after they were cut unfortunately, but you get the drift!

This is a picture of that extra piece... as I mentioned before, this configuration allowed for a nice chunk to stay in tact, which I might use for another cushion or something down the road. For now, it sits in the corner of the living room...
I was lucky that my wonderful and generous mom had some extra water resistant fabric she had purchased that she didn't want anymore. Actually, they were table cloths to start. I simply wrapped the pieces in the fabric, and did a mix of fabric gluing and duct taping on the backs to hold them in place. This is only a temporary solution, as I am still in search for affordable stainless steel safety pins (which I think will be the more permanent solution, so the covers can be easily taken on and off). If I had a sewing machine, I might consider trying to make some (I am not a seamstress, would have to learn!) But even at the nice cheap old lady down the street, these covers would have been almost $100 to make. Not necessary at this point in time to have them sewn. So for now, this option works pretty well!
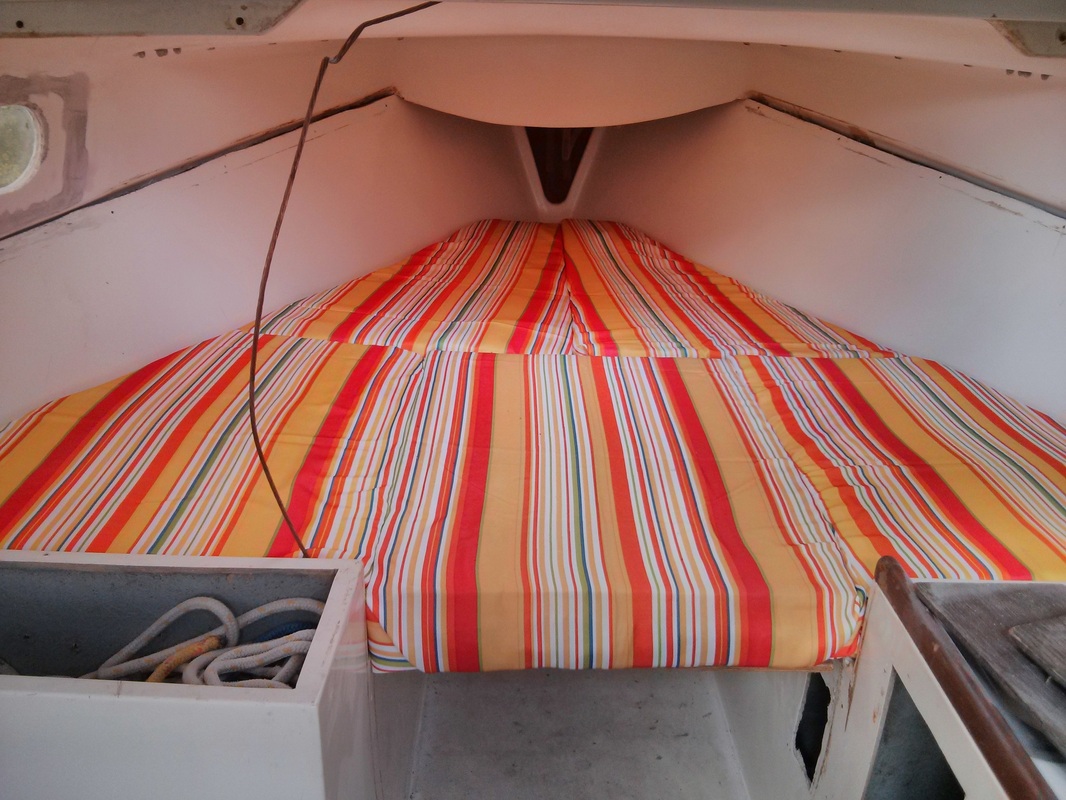
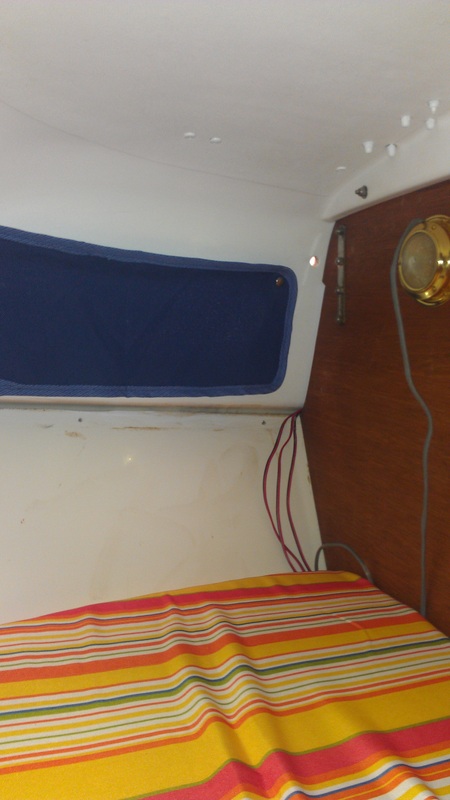
And here they are! This picture is with the bulkheads removed still, which makes it helpful to see most of the v-berth. I love the colors, they brighten up the small space really well. The thickness of the mattress is great too... enough to be comfortable, but not too much to make the space feel bulky. The cushions are easy to get in and out of the boat.
We will see how the fabric holds up in the moisture (we generally dry-sail our boat, but they will for sure get more moist when we are on overnights in the weekends to come). But I am hopeful that the water resistant fabric will work pretty well. If we didnt have this fabric already, we could have also gone with a waterproof option (which might have been a better idea in some ways, but maybe less comfortable?) For us, this was the best and cheapest option, and we are happy with the outcome!
Below are a couple more pictures (be sure to press on the picture to see the whole thing)!